Configuring Syteca Integration with Keycloak SSO
To set up Keycloak SSO (SAML 2.0) authentication so as to integrate it for use with the Syteca Management Tool, do the following:
Configuring Keycloak SSO
Log in to the Keycloak administrative console.
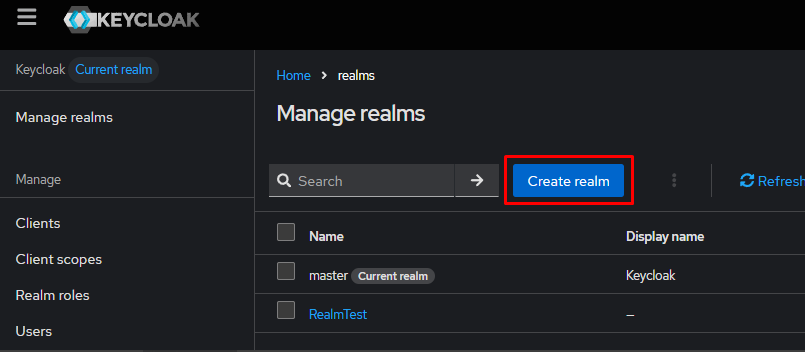
In the upper left corner, click Manage realms.
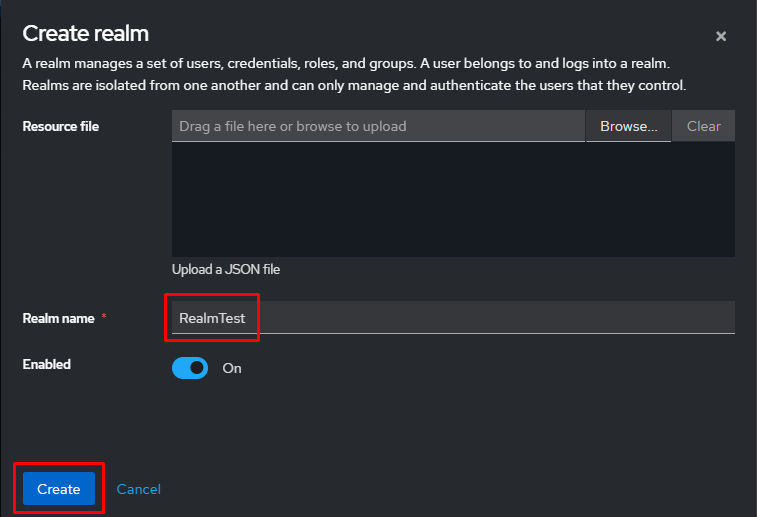
Click Create realm.
Enter a name for the Realm and click Create.
Configuring the LDAP Provider
To synchronize users from LDAP, you need to add an LDAP provider:
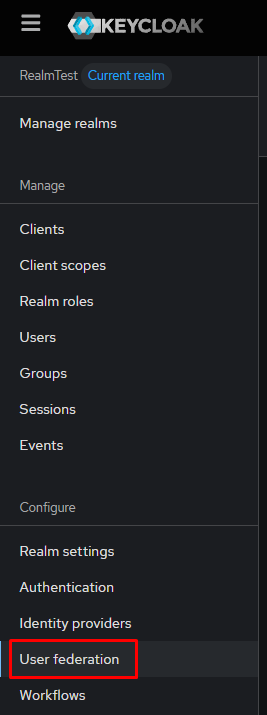
- Go to the User Federation section.
- Click Add LDAP providers.

- Next, fill in the required parameters:
Connection and authentication settings
Parameters | Values |
|---|---|
Vendor | Active Directory |
Connection URL | LDAP://<ldap-hostname-or-ip>, ex: LDAP://10.XXX.XXX.30 |
Connection pooling | OFF |
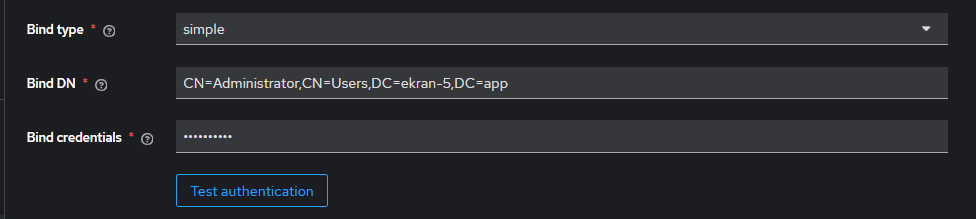
Bind Type | simple |
Bind DN | DN service user, ex: CN=Administrator,CN=Users,DC=ekran-5,DC=app |
Bind Credential | Service user password |
Use Truststore SPI | Always |

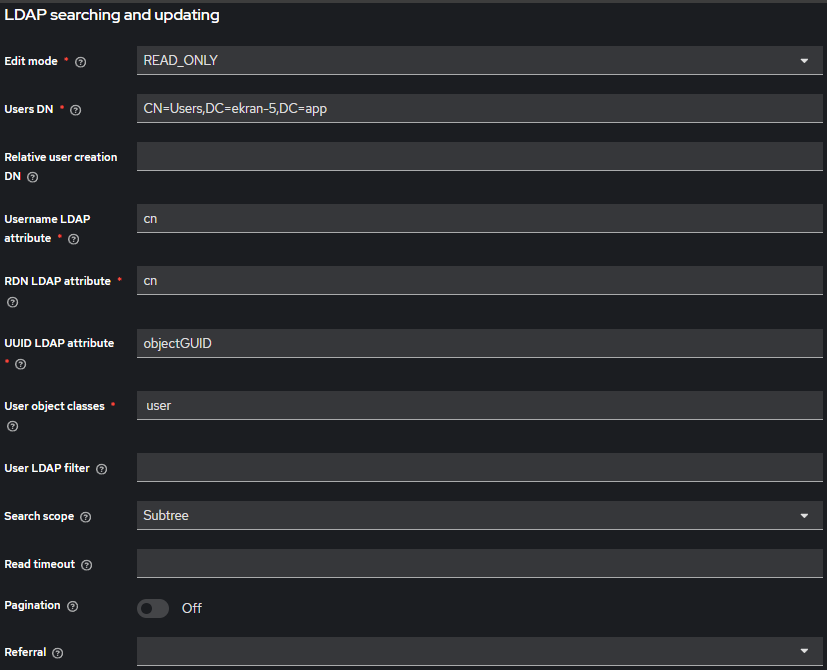
LDAP searching and updating
Parameters | Values |
|---|---|
Edit mode | READ_ONLY |
Users DN | DN, in which users are located, ex: CN=Users,DC=ekran-5,DC=app |
Username LDAP attribute | cn |
RDN LDAP attribute | cn |
UUID LDAP attribute | objectGUID |
User object classes | user |
Search scope | Subtree |
Pagination | OFF |
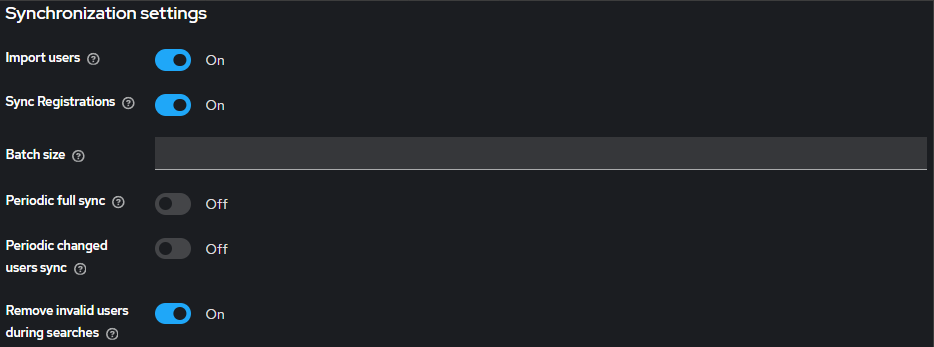
Synchronization settings
Parameters | Values |
|---|---|
Import Users | ON |
Sync Registrations | ON |
Periodic Full Sync | OFF |
Periodic Changed Users Sync | OFF |
- Save LDAP Provider settings.
Configure LDAP Mapper for Distinguished Name (DN) synchronization
To transfer a user's full DN from LDAP to Keycloak, you need to create a mapper:
- Navigate to User Federation → LDAP provider → Mappers → Add mapper.
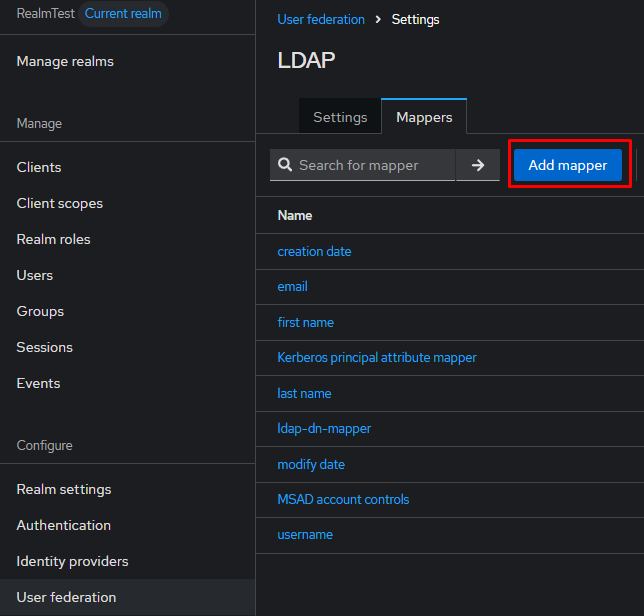
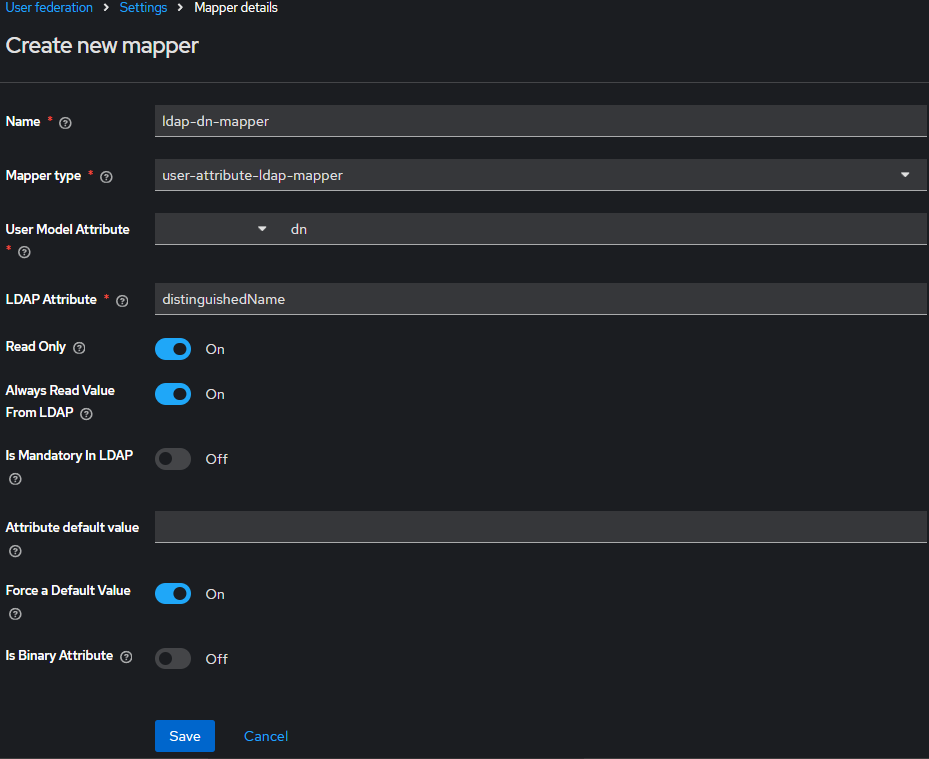
- Create a mapper with the following parameters:
Parameters | Values |
|---|---|
Name | ldap-dn-mapper |
Mapper Type | user-attribute-ldap-mapper |
User Model Attribute | dn |
LDAP Attribute | distinguishedName |
Read Only | ON |
Always Read Value From LDAP | ON |
Is Mandatory In LDAP | OFF |
- Save the mapper.
Check DN synchronization
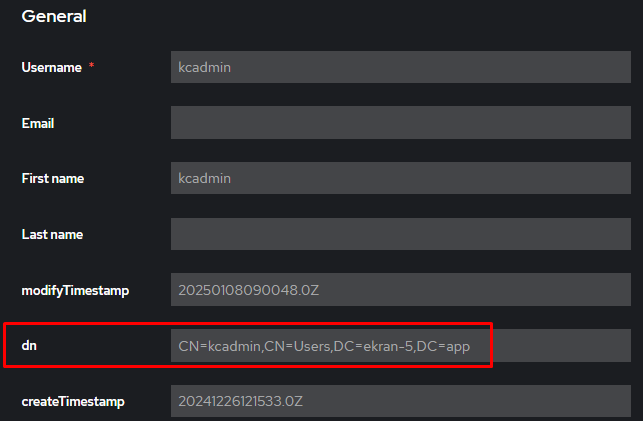
After configuration, we recommend checking that the distinguishedName attribute is synchronizing correctly:
- Go to the Users section.
- Open any user imported from LDAP.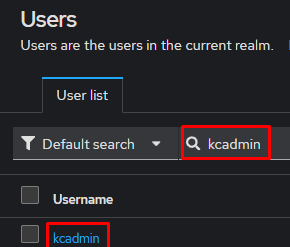
- The Details tab should display the dn attribute with user and domain information (e.g. CN=User Name,OU=Users,DC=domain,DC=com)
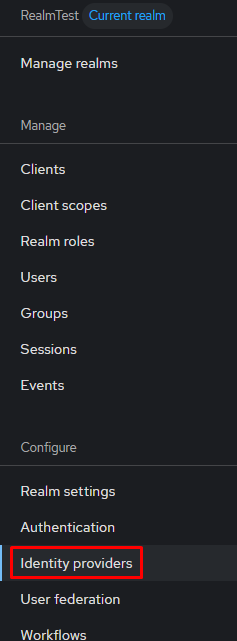
Setting up an Identity Provider (SAML v2.0)
Adding a SAML Identity Provider:
- Go to the Identity Providers section.
- Select SAML v2.0.
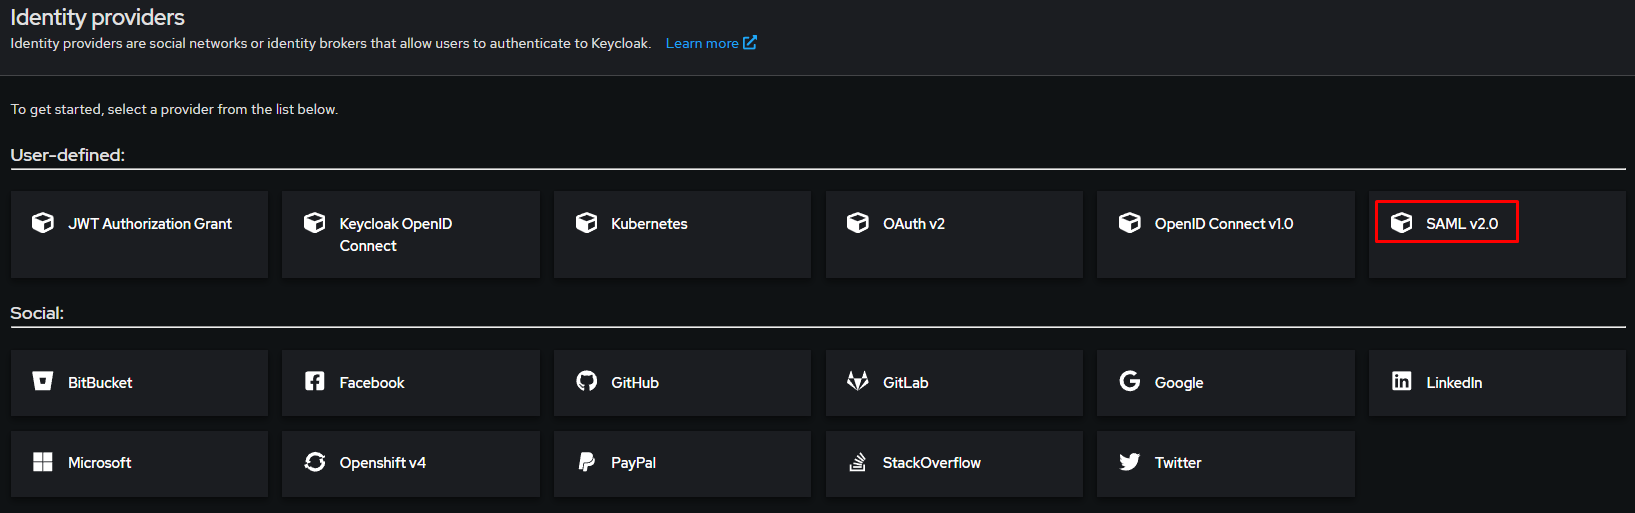
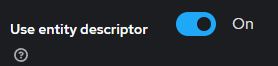
To make the required fields available, you must disable the Use entity descriptor option.
- Fill in the following fields:
Parameters | Values |
|---|---|
Service provider entity ID | https://<ip-or-hostname>/Syteca |
Identity provider entity ID | https://<ip-or-hostname>:<port>/realms/<realmName> - use the URL of our Realm (ex: https://10.XXX.XXX.159:8443/realms/RealmTest ) |
Single Sign-On service URL | https://<ip-or-hostname>/Syteca/Account/ConsumeSSO/ - use the URL of Syteca MT |
Single logout service URL | https://<ip-or-hostname>/Syteca/Account/SsoLoggedOut/ |
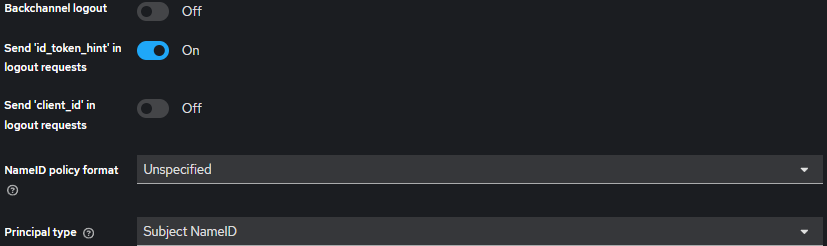
NameID policy format | Unspecified |
Principal type | Subject NameID |
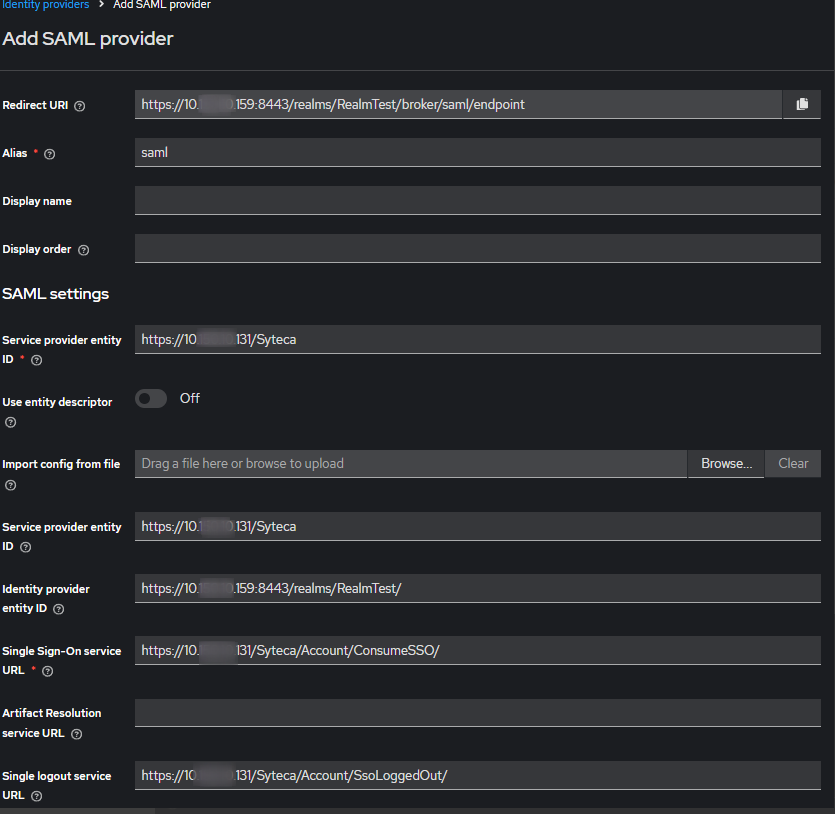
- Add using the Add button.
Export IdP Metadata XML
To complete SAML configuration, you need to export the Realm metadata:
- Go to the Realm Settings section.
- Open the General tab.
- Click SAML 2.0 Identity Provider Metadata.
- Save the file, for example: IdP_metadata.xml.

This file is used on the Service Provider in the Syteca Management Tool.
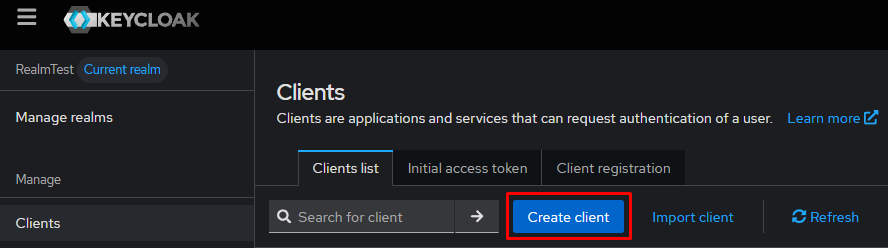
2.Creating a Client (Service Provider)
Go to the Clients section and create a new client:
Click Create client
In the General Settings section, fill in:
General Settings
Parameters | Values |
|---|---|
Client type | SAML |
Client ID | https://<ip-or-hostname>/Syteca - use the URL of Syteca Management Tool |
The remaining parameters can be left at default.
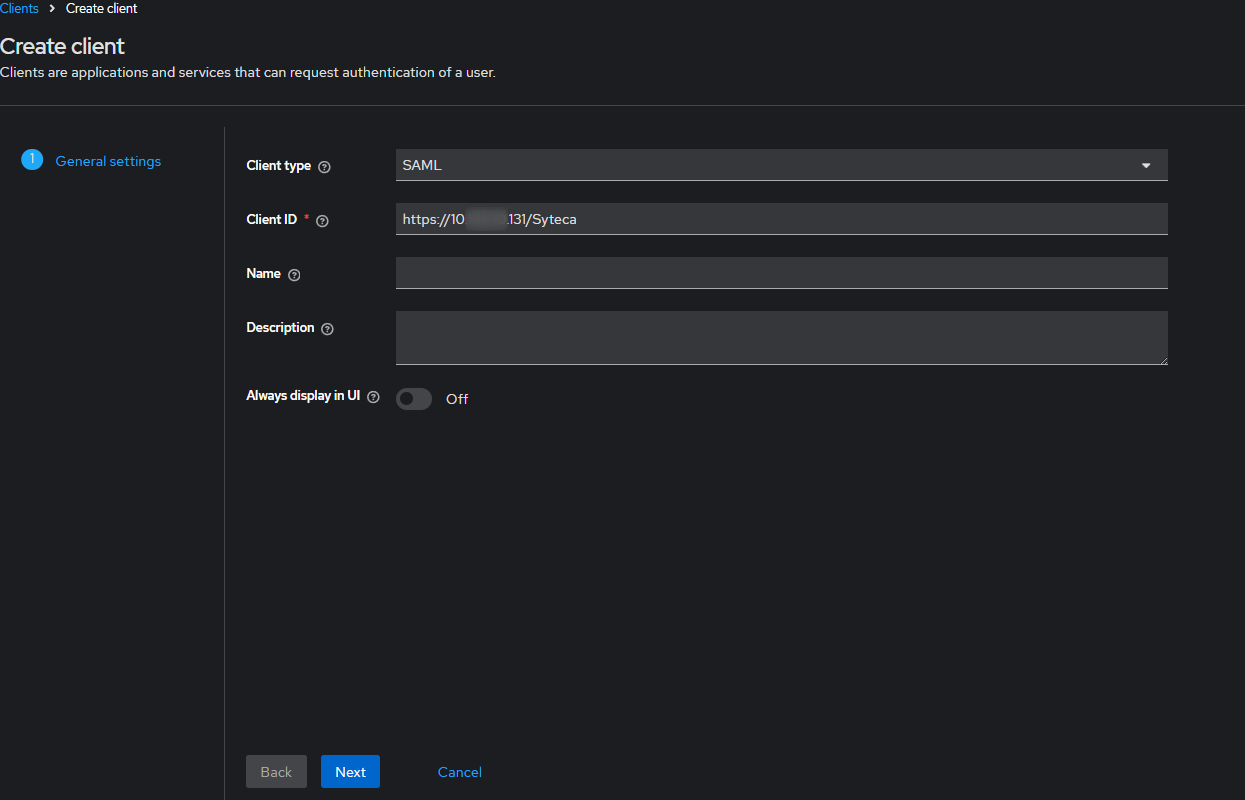
Click Next
Login Settings
Parameter | Value |
|---|---|
Valid redirect URIs | https://<ip-or-hostname>/Syteca/* |
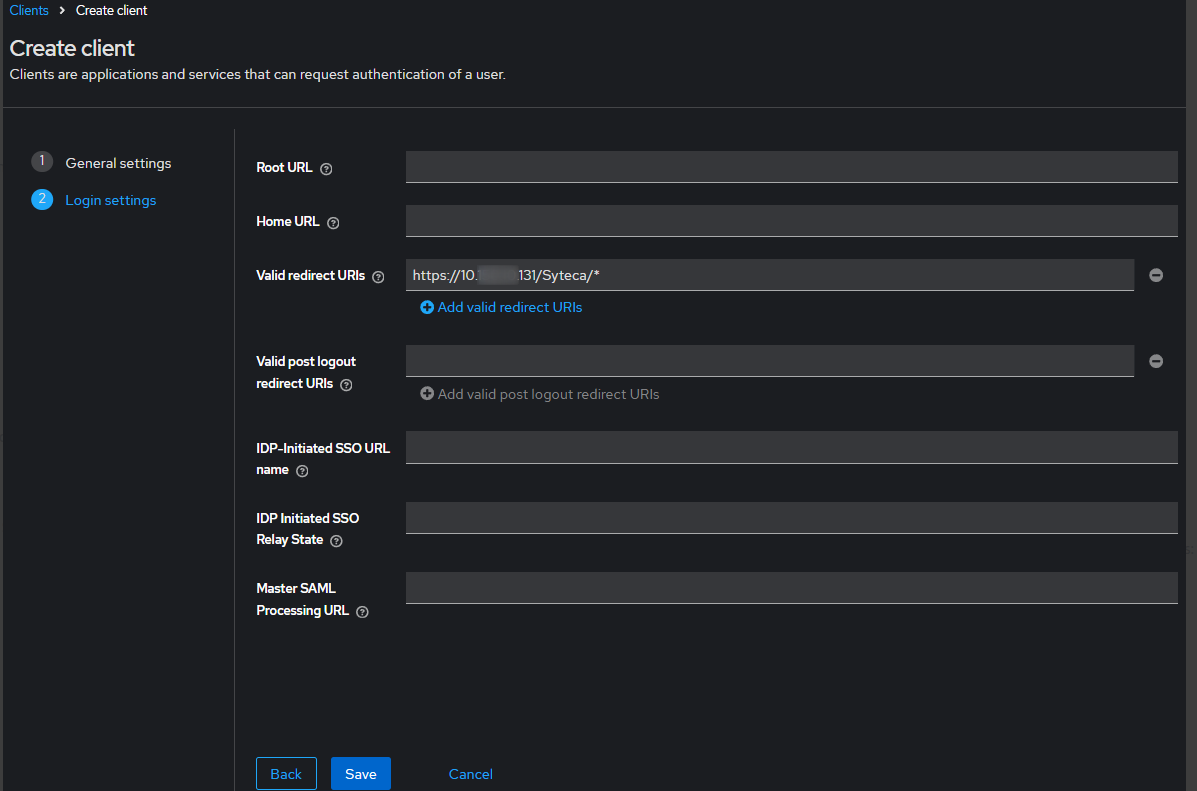
Click Save
Checking SAML Capabilities
After saving, open the created Client (Service Provider) settings and check the parameters in the SAML capabilities section:
Parameters | Values |
|---|---|
Force POST binding | ON |
Include AuthnStatement | ON |

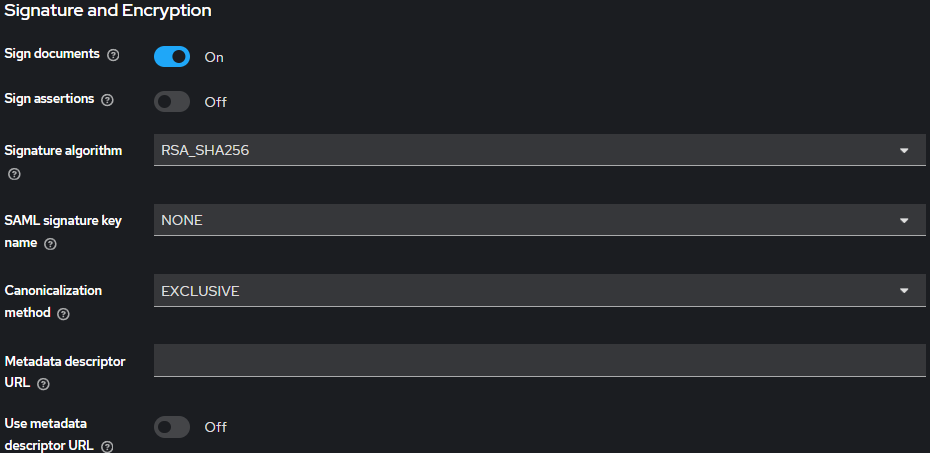
In the Signature and Encryption settings section, make the following settings:
Configuring SAML Endpoints
Go to the Advanced tab of the client settings and fill in the endpoints:
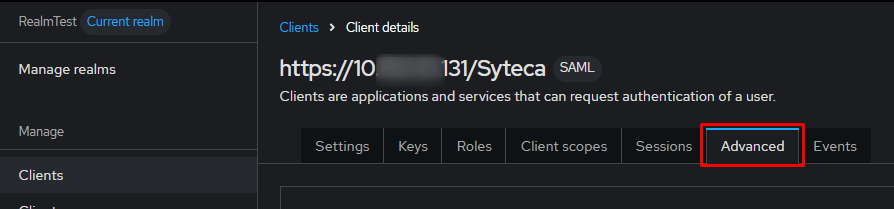
Parameters | Values |
|---|---|
Assertion Consumer Service POST Binding URL | https://<ip-or-hostname>/Syteca/Account/ConsumeSSO |
Logout Service POST Binding URL | https://<ip-or-hostname>/Syteca/Account/SingleLogout |
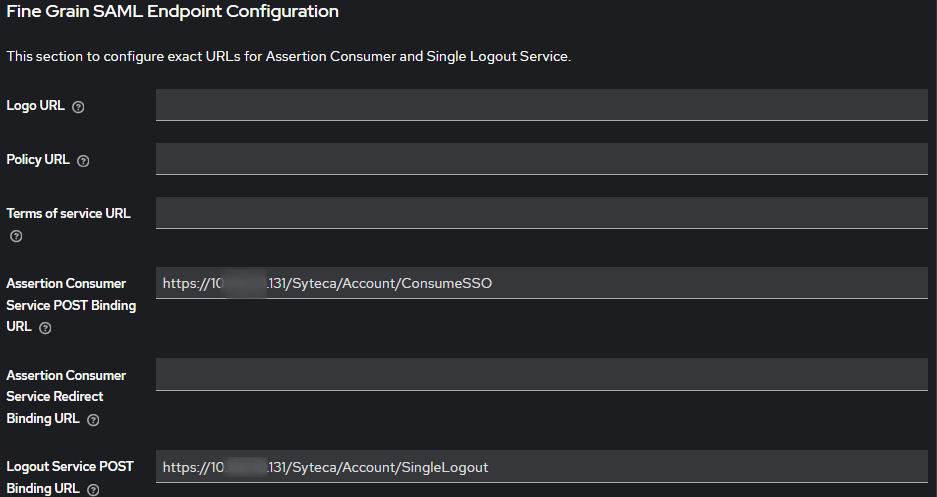
Save the changes.
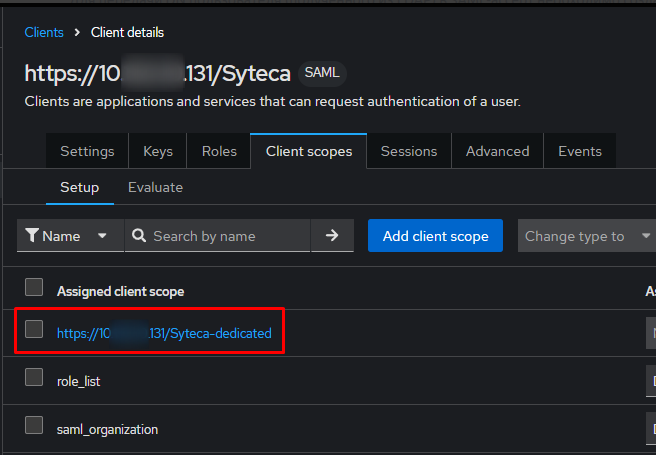
Creating a SAML Attribute Mapper
To pass the user's DN (obtained from LDAP) to the SAML assertion, you need to create a mapper.
Navigate to:
Clients → our SAML Client → Client scopes
If mappers have not been created previously, click Configure a new mapper
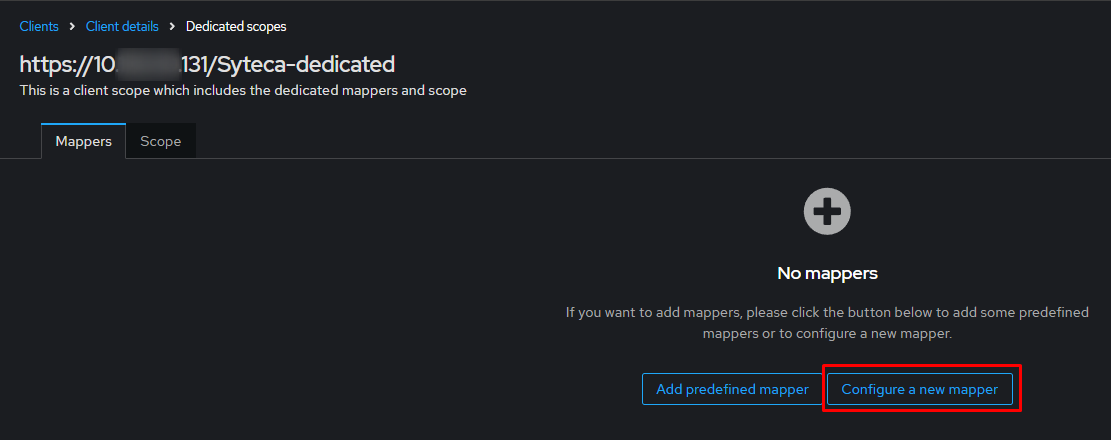
If mappers already exist, select Add mapper → By configuration
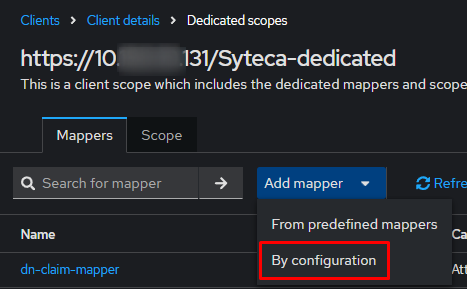
Then click on User Atributes
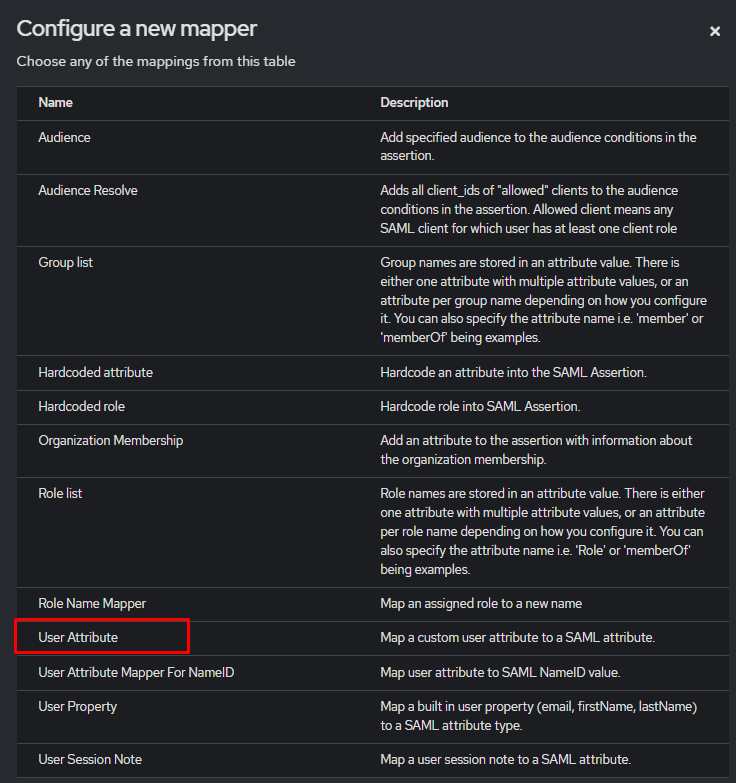
We create a mapper with the following parameters:
Parameters | Values |
|---|---|
Mapper Type | User Attribute |
Name | dn-claim-mapper |
User Attribute | dn |
SAML Attribute Name | http://schemas.xmlsoap.org/ws/2005/05/identity/claims/dn |
SAML Attribute NameFormat | URI Reference |
The User Attribute value must exactly match the name of the attribute created earlier in LDAP Mapper (in our case dn).
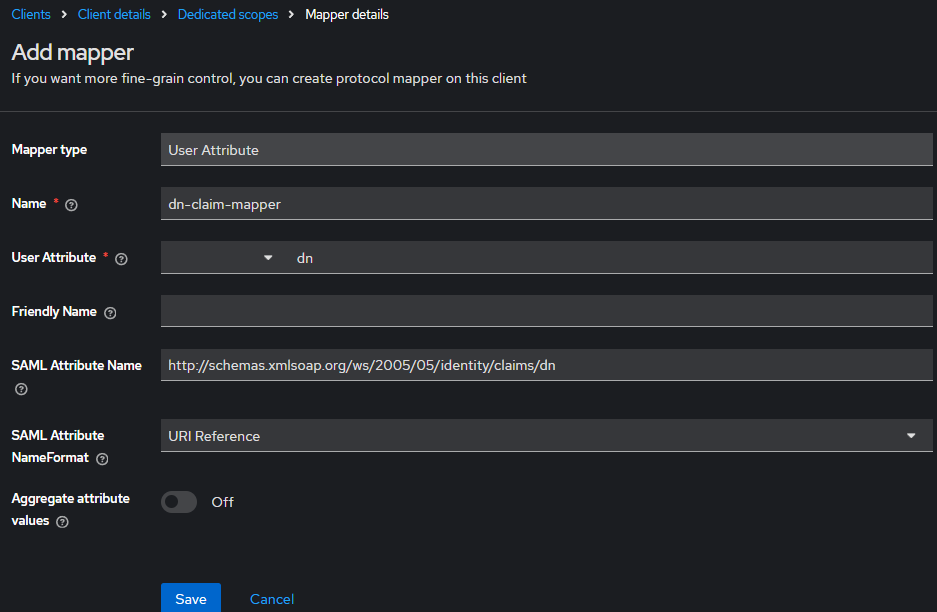
Save the mapper.
Setting up SSO Integration in the Syteca Management Tool.
In the SSO Integration settings in the Syteca Management Tool, fill in the following fields:
Parameters | Values |
|---|---|
Issuer name | URL in the Syteca Management Tool ( for example, https://<ip-or-hostname>/Syteca) |
Identity provider metadata (XML) | XML file (Save the XML on the Realm settings page - SAML 2.0 Identity Provider Metadata) 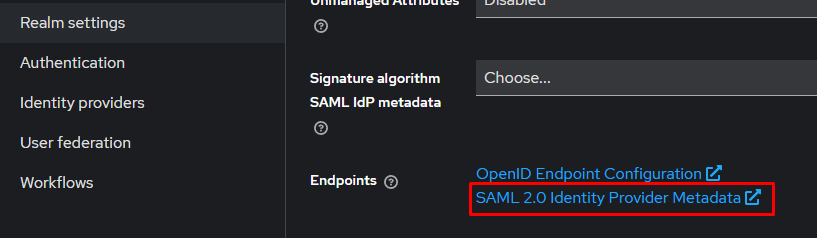 |
Custom certificate | If we want to use a certificate generated by Keycloak |
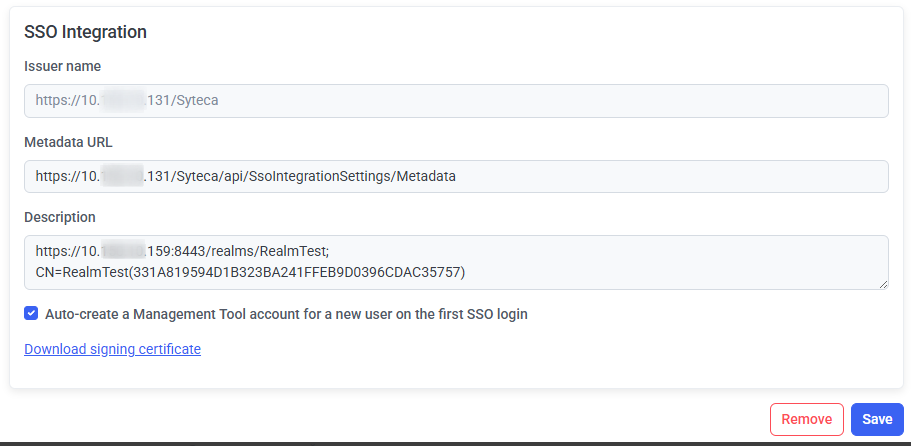
SSO authentication is not currently implemented for use in Multi-Tenant mode.
Click Save to apply the changes.
Restart the EkranServer service in Services.
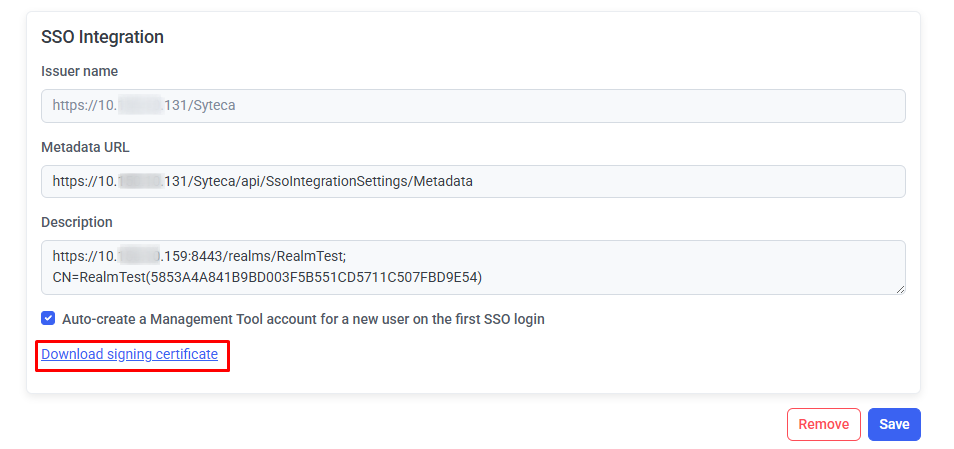
Using a Self-signed Certificate in the Syteca Management Tool
If you plan to use a self-signed certificate from MT, you must complete additional steps.
Step 1. Export the MT certificate:
In the SSO settings in MT:
Fill in the required fields
Click Download signing certificate
Save the certificate (SsoCert.cer)
Step 2. Converting the certificate to PEM format
If the certificate was downloaded in DER format (.cer), convert it to PEM:BASHopenssl x509 -inform DER -in SsoCert.cer -out SsoCert.pem
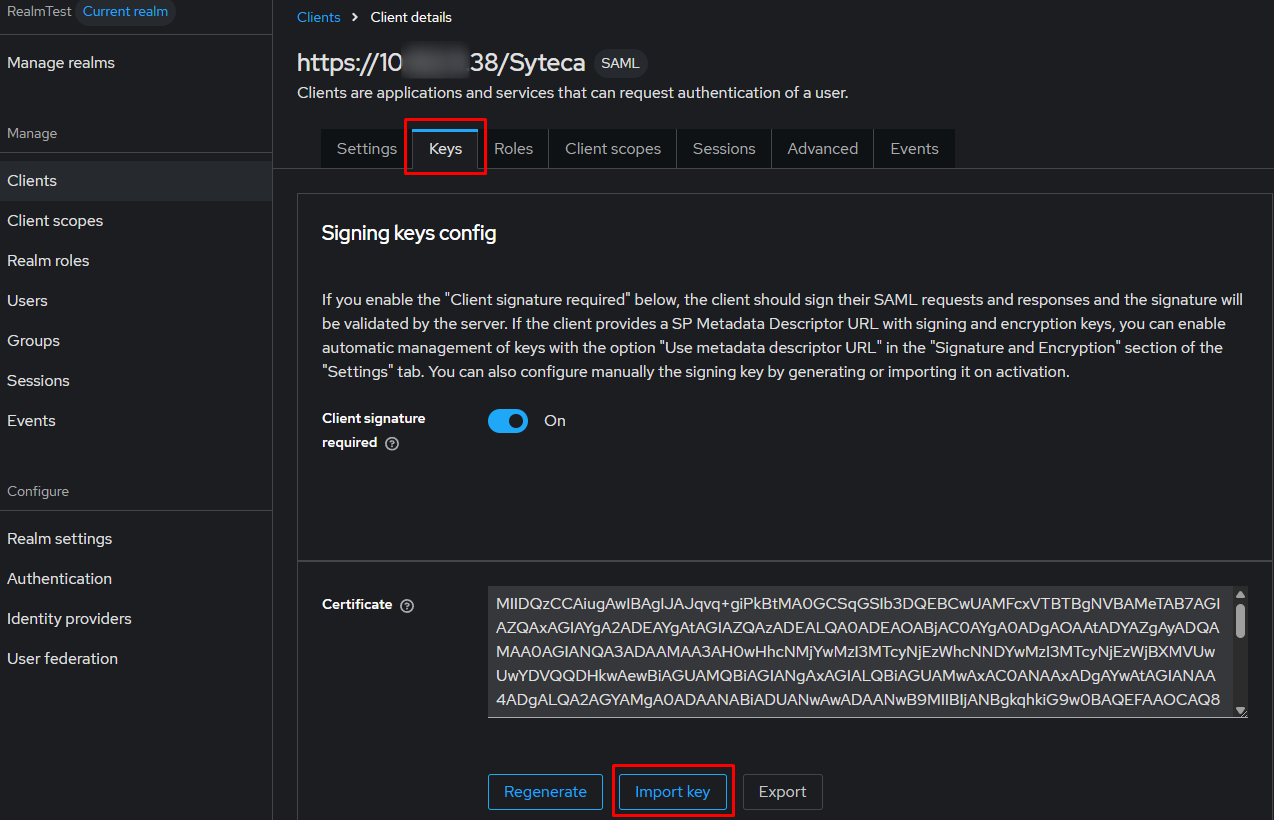
Step 3. Import the certificate into Keycloak:
Go to Clients → [our SAML client]
Open the Keys tab
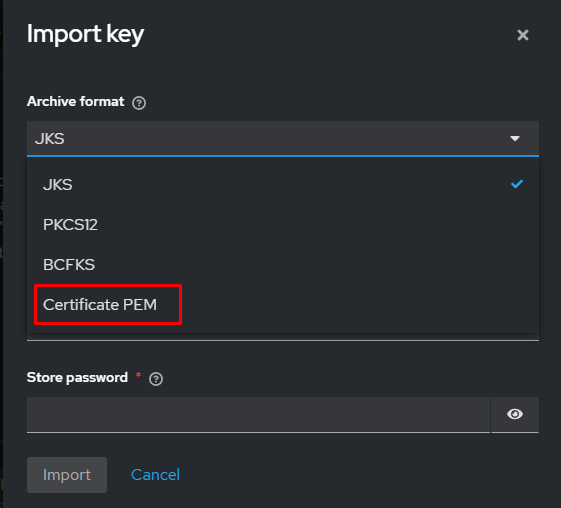
Click Import key
Upload file SssoCert.pem
Click Save to apply the changes.